0%

JS逆向实战-1

一些基础:https://github.com/ilikeoyt/ilikeoyt.github.io/blob/main/JS%E5%89%8D%E7%AB%AF%E9%80%86%E5%90%91%E5%AD%A6%E4%B9%A0(1).pdf

网站:aHR0cDovL3R6eG0uanh6d2Z3dy5nb3YuY24vaWNpdHkvaXByby9vcGVuL3B1YmxpY2l0eQ==

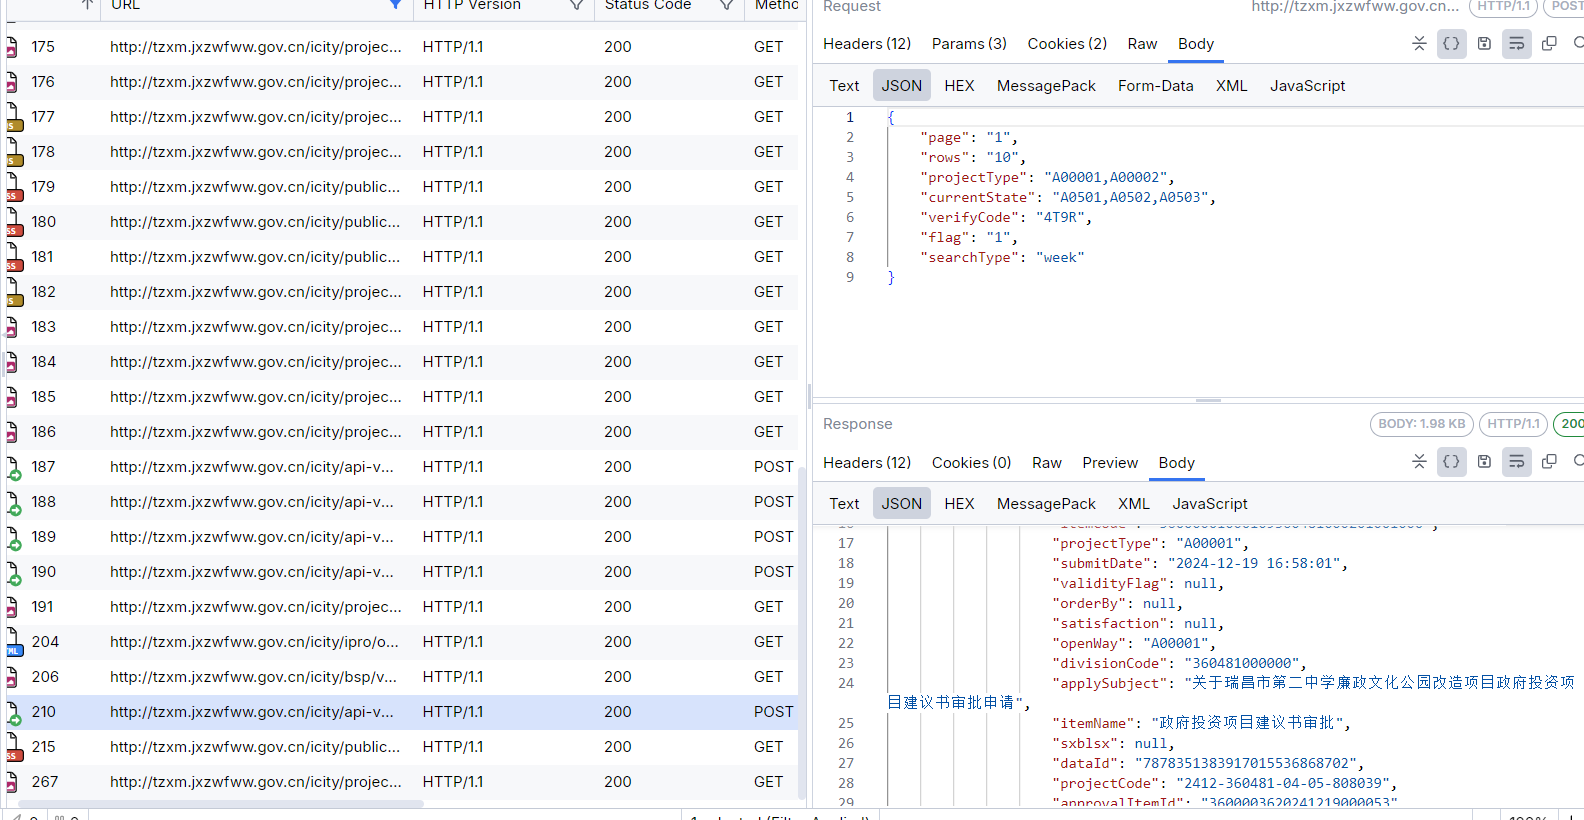
由于这个网站每次访问一个页面都需要验证码,所以首先通过fiddler抓取网站流量

很容易找到我们需要的数据

image-20241219182506318

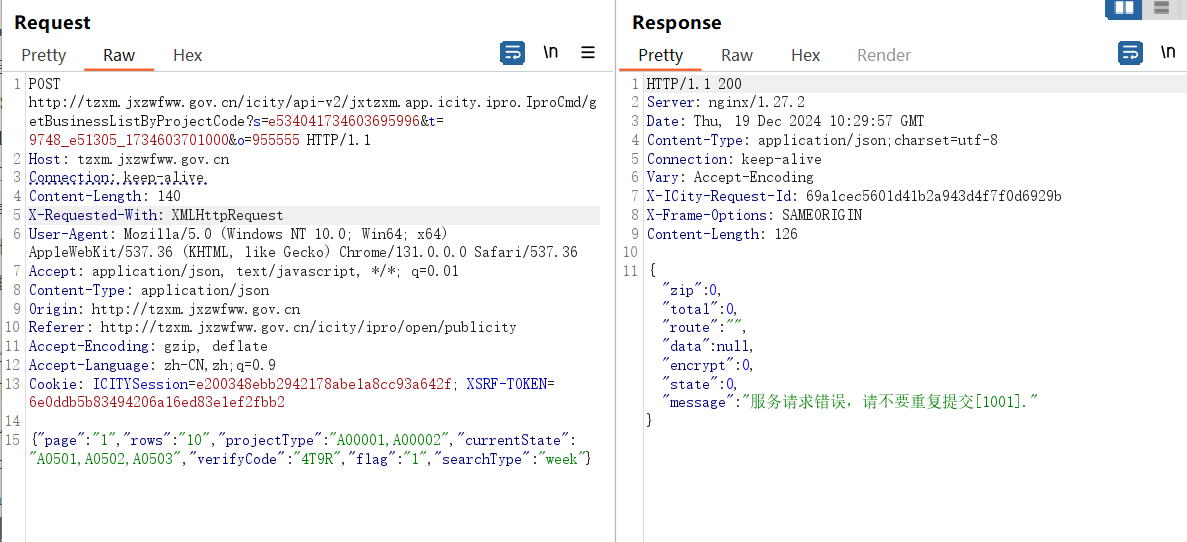
将raw的数据通过burp发送

image-20241219183051606

可以看到GET中有三个参数,经过测试,这三个参数在每次请求均会发生变化

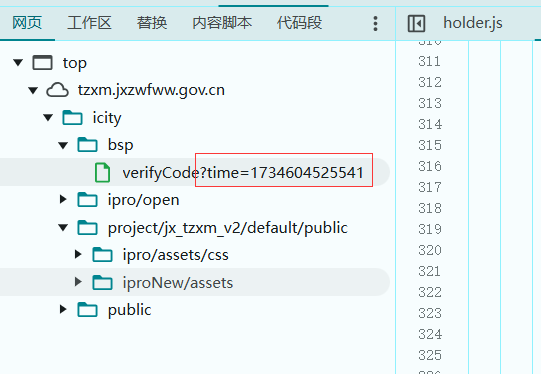
f12慢慢找一下,首先在图片这里发现一个时间戳,和参数t有点相似

image-20241219192458764

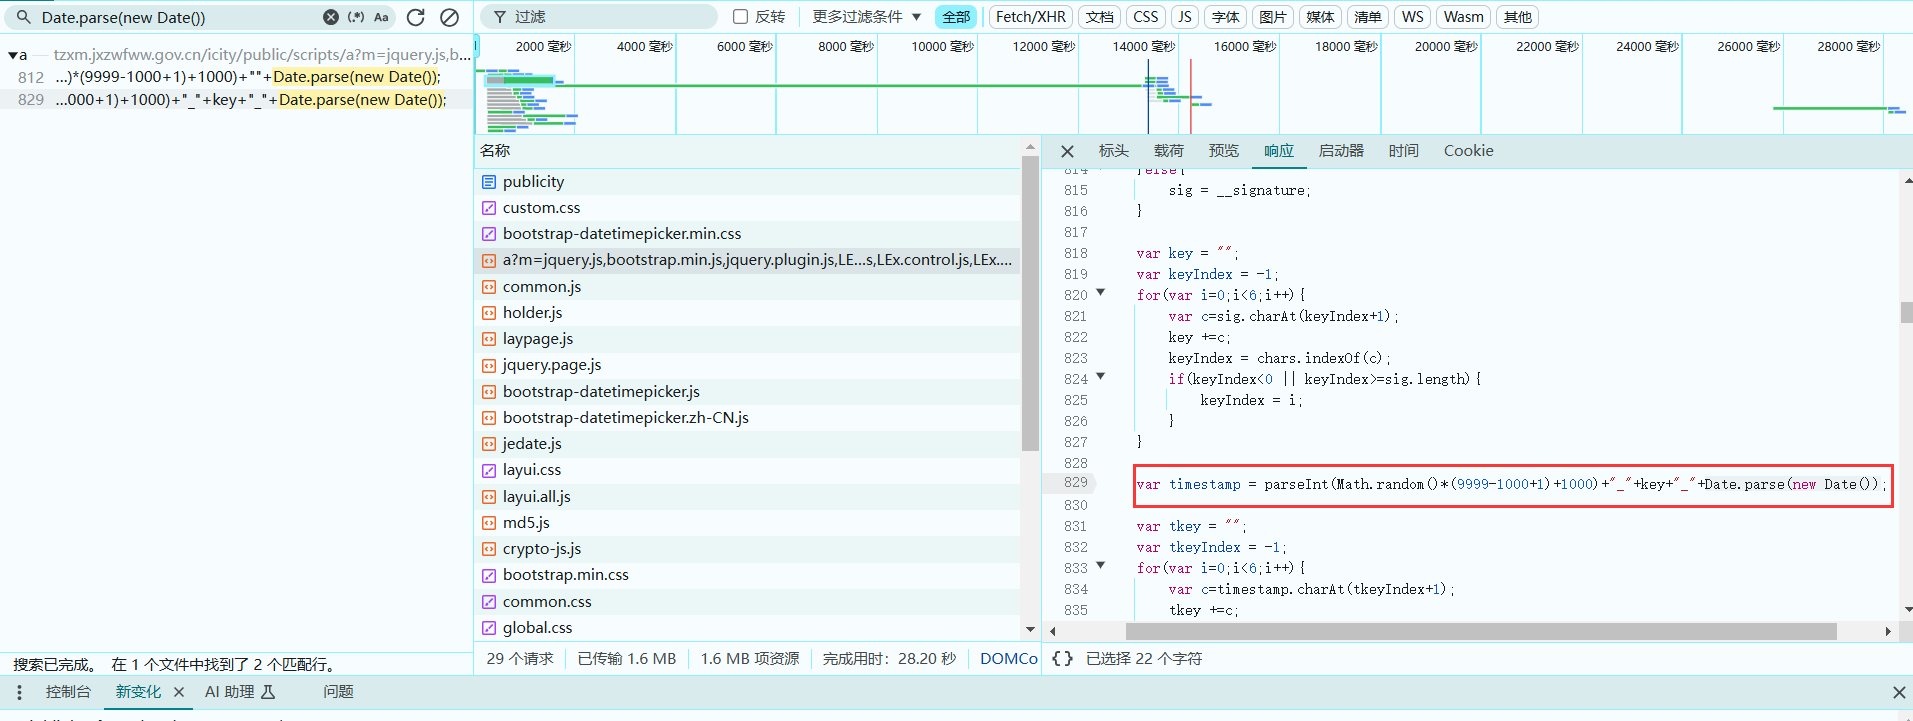
于是全局寻找一下Date.parse(new Date()),只有两处,很明显是下面这个地方

image-20241219192719064

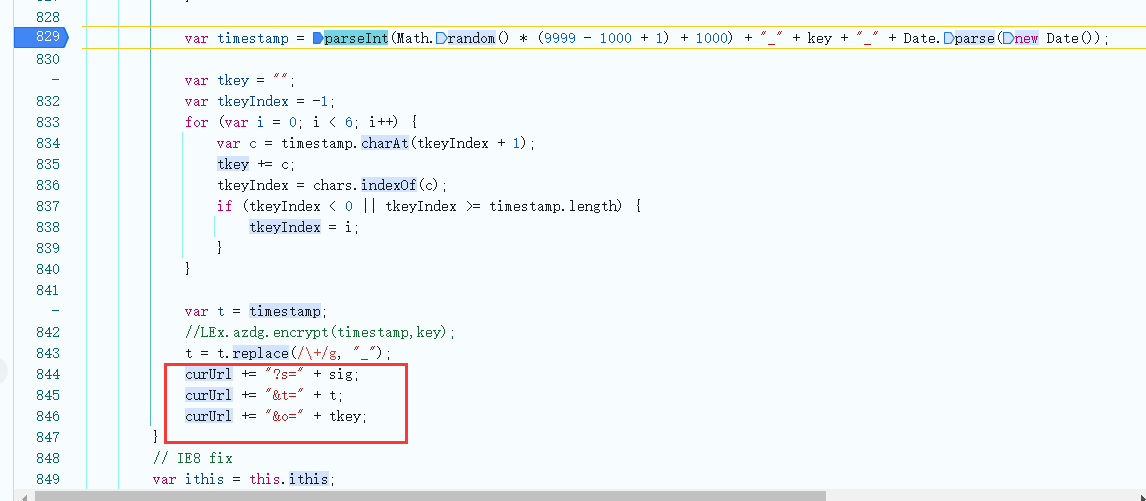
跟进一下这里的代码,往下再翻一下就看到了三个参数的赋值

image-20241220095144449

简单写了一个函数

1
2
3
4
5
6
7
8
9
10
11
12
13
14
15
16
17
18
19
20
21
22
23
24
25
26
27
28
29
30
31
32
33
34
35
36
37
38
39
40
41
42
43
44
function generate_encryption(__signature) {
var sig = "";
var chars = "0123456789abcdef";

// 生成 sig 字符串
if (!LEx.isNotNull(__signature)) {
var curTime = parseInt(Math.random() * (9999 - 1000 + 1) + 1000) + "" + Date.parse(new Date());
sig = chars.charAt(parseInt(Math.random() * (15 - 15 + 1) + 10)) + chars.charAt(curTime.length) + "" + curTime;
} else {
sig = __signature;
}

// 生成 key 字符串
var key = "";
var keyIndex = -1;
for (var i = 0; i < 6; i++) {
var c = sig.charAt(keyIndex + 1);
key += c;
keyIndex = chars.indexOf(c);
if (keyIndex < 0 || keyIndex >= sig.length) {
keyIndex = i;
}
}

// 生成 timestamp 字符串
var timestamp = parseInt(Math.random() * (9999 - 1000 + 1) + 1000) + "_" + key + "_" + Date.parse(new Date());

// 生成 tkey 字符串
var tkey = "";
var tkeyIndex = -1;
for (var i = 0; i < 6; i++) {
var c = timestamp.charAt(tkeyIndex + 1);
tkey += c;
tkeyIndex = chars.indexOf(c);
if (tkeyIndex < 0 || tkeyIndex >= timestamp.length) {
tkeyIndex = i;
}
}

// 返回加密结果
var t = timestamp;
return { sig: sig, t: t, tkey: tkey };
}

然后就是注册函数,连接RPC的操作

1
2
3
4
5
demo.regAction("test", function (resolve,param) {
//这样添加了一个param参数,http接口带上它,这里就能获得
var base666 = generate_encryption(param)
resolve(base666);
})

MITM.py

1
2
3
4
5
6
7
8
9
10
11
12
13
14
15
16
17
18
19
20
21
22
23
24
25
26
27
28
29
30
31
import json
import requests
from mitmproxy import http


def request(flow: http.HTTPFlow) -> None:
# 检查请求的 URL 是否符合条件
if flow.request.pretty_url.startswith("url/"):

# 构建请求数据,发送到本地服务
data = {"group": "zzz", "action": "test", "param": ""}

# 发送 POST 请求到本地服务
res = requests.post("http://127.0.0.1:12080/go", data=data)

# 解析响应的 JSON 数据
res_json = json.loads(res.text)["data"]
data_json = json.loads(res_json)
print("Received data:", data_json)

# 提取 sig, t, tkey
sig = data_json["sig"]
t = data_json["t"]
tkey = data_json["tkey"]

# 将 sig, t, tkey 作为 GET 参数替换原请求的 URL
new_url = flow.request.pretty_url.split('?')[0] # 保留 URL 主体部分
new_url += f"?s={sig}&t={t}&o={tkey}"

# 更新请求 URL
flow.request.url = new_url

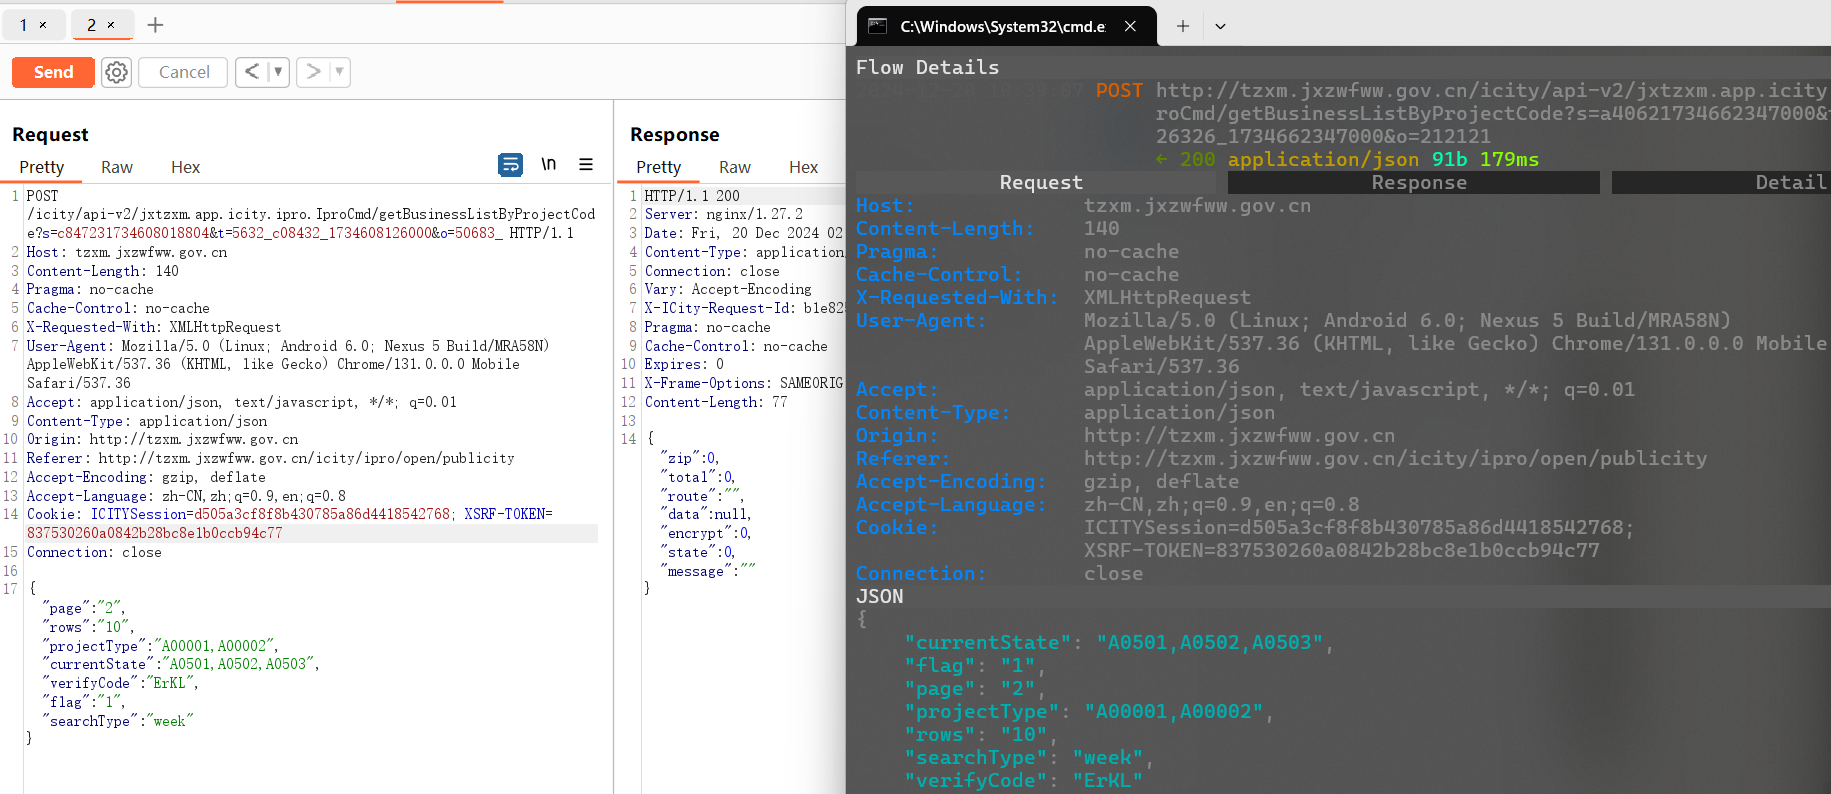
image-20241220103937543

能绕过避免重复请求的信息,但是还有验证码的东西,所以还是请求不了数据,识别其实还是好弄

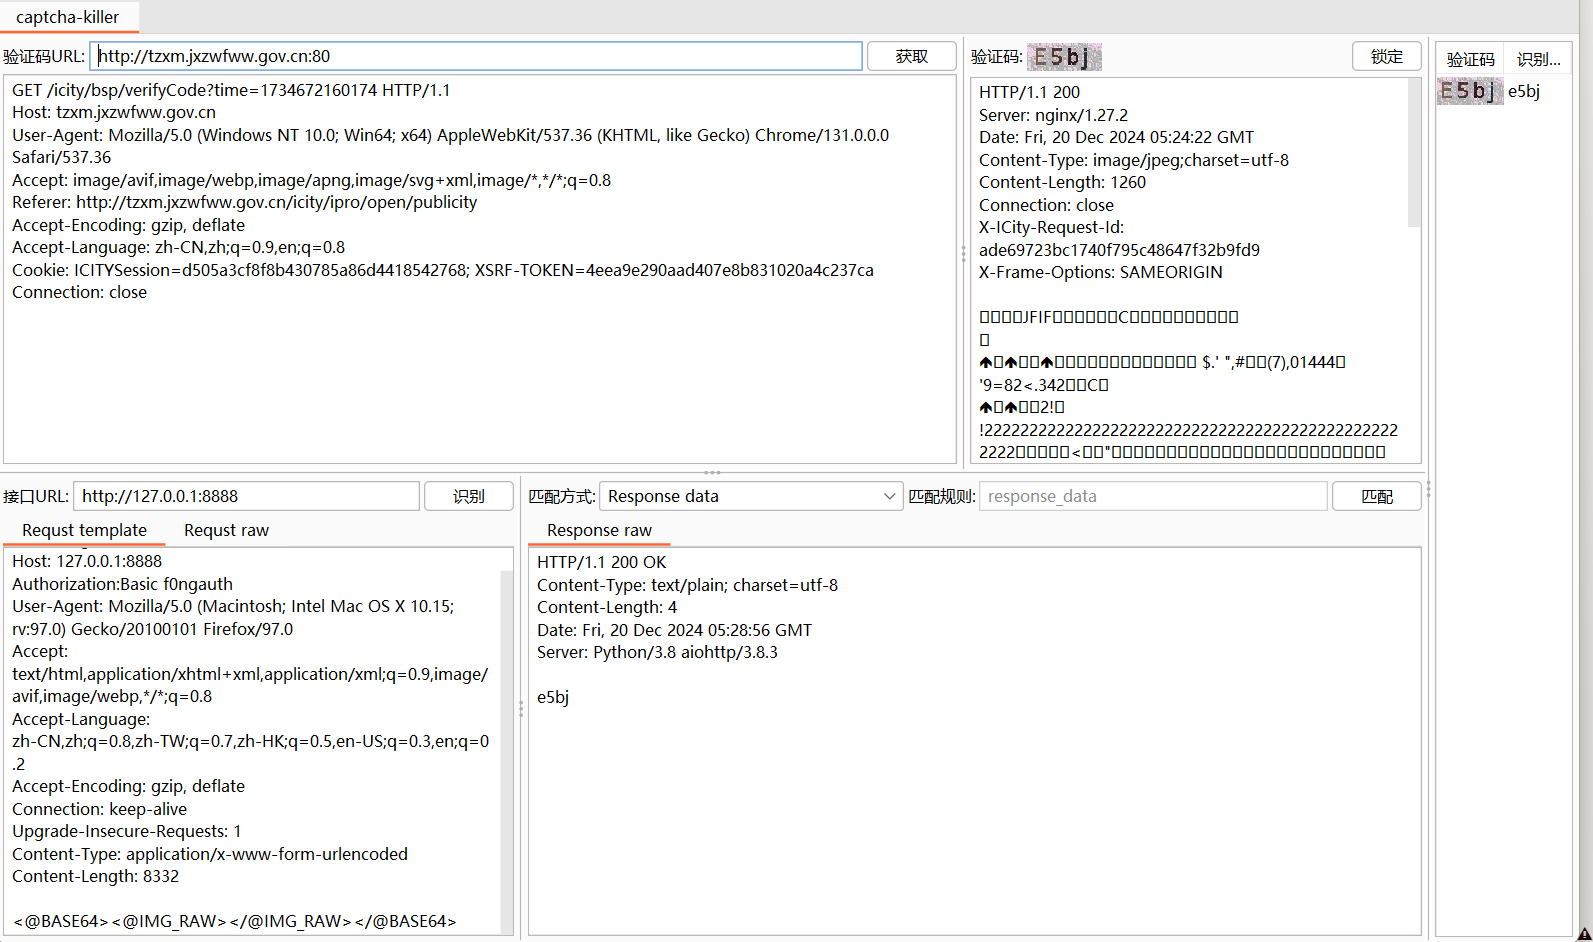
image-20241220133433242

实现自动化的话简单修改一下MITM脚本

1
2
3
4
5
6
7
8
9
10
11
12
13
14
15
16
17
18
19
20
21
22
23
24
25
26
27
28
29
30
31
32
33
34
35
36
37
38
39
40
41
42
43
44
45
46
47
48
49
50
51
52
53
54
55
56
57
58
59
60
61
62
63
64
65
import base64
import json
import requests
from mitmproxy import http


def request(flow: http.HTTPFlow) -> None:
# 检查请求的 URL 是否符合条件
if flow.request.pretty_url.startswith("http://tzxm.jxzwfww.gov.cn/icity/api-v2/jxtzxm.app.icity.ipro.IproCmd/"):

# 构建请求数据,发送到本地服务
data = {"group": "zzz", "action": "test", "param": ""}

# 发送 POST 请求到本地服务
res = requests.post("http://127.0.0.1:12080/go", data=data)

# 解析响应的 JSON 数据
res_json = json.loads(res.text)["data"]
data_json = json.loads(res_json)
print("Received data:", data_json)

# 提取 sig, t, tkey
sig = data_json["sig"]
t = data_json["t"]
tkey = data_json["tkey"]

# 将 sig, t, tkey 作为 GET 参数替换原请求的 URL
new_url = flow.request.pretty_url.split('?')[0] # 保留 URL 主体部分
new_url += f"?s={sig}&t={t}&o={tkey}"

code_res = requests.get(f"http://tzxm.jxzwfww.gov.cn/icity/bsp/verifyCode?time={t}")
url = "http://127.0.0.1:8888/reg"
headers = {
"Authorization": "Basic f0ngauth",
"User-Agent": "Mozilla/5.0 (Macintosh; Intel Mac OS X 10.15; rv:97.0) Gecko/20100101 Firefox/97.0",
"Accept": "text/html,application/xhtml+xml,application/xml;q=0.9,image/avif,image/webp,*/*;q=0.8",
"Accept-Language": "zh-CN,zh;q=0.8,zh-TW;q=0.7,zh-HK;q=0.5,en-US;q=0.3,en;q=0.2",
"Accept-Encoding": "gzip, deflate",
"Connection": "keep-alive",
"Upgrade-Insecure-Requests": "1",
"Content-Type": "application/x-www-form-urlencoded" # 可根据服务端要求调整这个类型,如果服务端期望接收Base64编码后的数据为其他格式需更改
}

# 对获取到的数据进行Base64编码,先判断数据类型进行相应处理
if isinstance(code_res.content, bytes):
encoded_data = base64.b64encode(code_res.content).decode('utf-8')
elif isinstance(code_res.content, str):
encoded_data = base64.b64encode(code_res.content.encode('utf-8')).decode('utf-8')
else:
raise ValueError("不支持的数据类型进行Base64编码")

data = encoded_data
# 如果实际的Content-Length需要准确设置,要根据data真实长度来调整,这里示例简单示意下
headers["Content-Length"] = str(len(data))

response = requests.post(url, headers=headers, data=data)
Code = response.text

request_body_dict = flow.request.json()
# 替换verifyCode的值
request_body_dict["verifyCode"] = Code
# 将修改后的字典再转换回字节流形式,设置回请求体
flow.request.text = request_body_dict.__str__()
# 更新请求 URL
flow.request.url = new_url

但是还是没有数据,不清楚为什么